Step-by-Step Guide
🔐 Log in to Agentix cPanel
- Open the Agentix cPanel in your browser
-
Login using your Manager User credentials
You will have access to all management features, including user, PowerLinks, workflows and analytics management.
🛒 Browse & Install Powerlink from Store
- Go to Store → Catalogue
-
Browse ready-made PowerLinks like:
- 📞 Realtime (for live chat or calls)
- 📤 Media Upload (for document intake)
- 📣 Outbound Dialer (for outbound telephony dialing)
-
Click Install to add a PowerLink to your workspace.
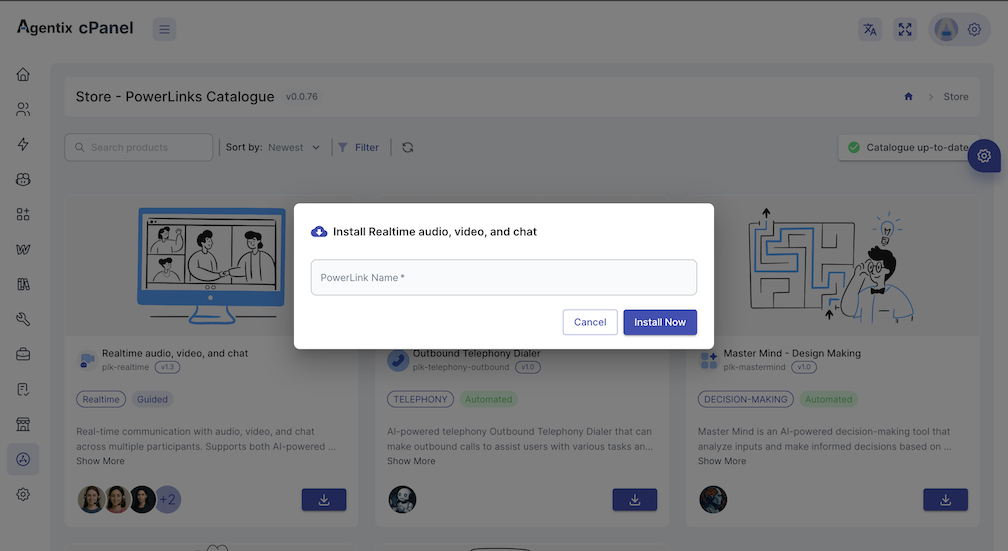
PowerLinks are prebuilt, configurable applications designed for specific service modes: self-service, guided or automated.
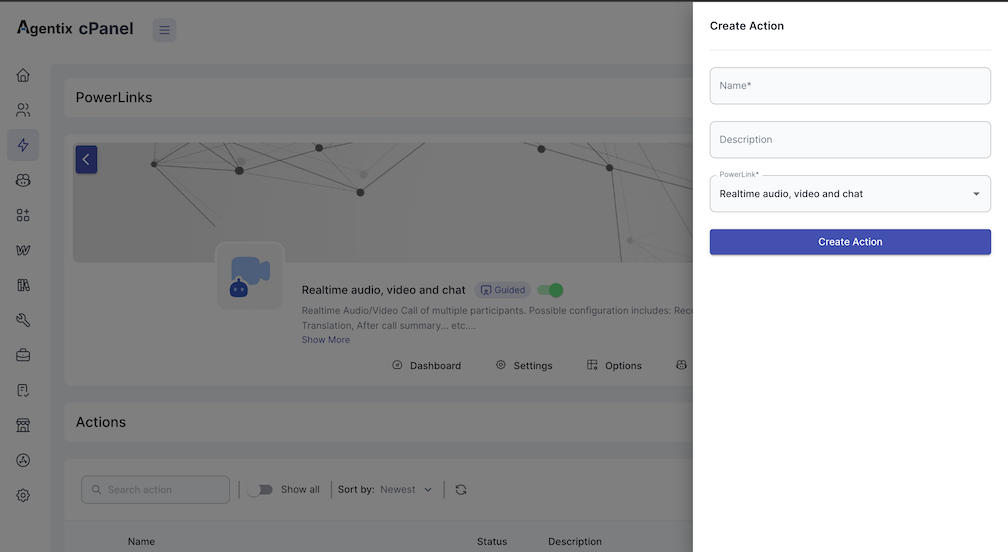
🧩 Create PowerLink Actions
- Navigate to PowerLinks
- Select the installed PowerLink
- Create one or more Actions representing customer steps
-
For each Action: set name and description
-
For each Action: set name and description
Actions are the building blocks of your customer journey. Each Action represents a specific step in the workflow, allowing for detailed customization and control.
🧠 Assign Agent - Define Instructions, Tools & Sources
- Assign an AI-Agent to the Action from the available agents in the PowerLink
-
Attach any required:
- 🔧 Tools (e.g., CRM lookup, data processing)
- 📚 Sources (RAG knowledge, static files, forms)
-
Write agent instructions to guide how AI-Agent responds
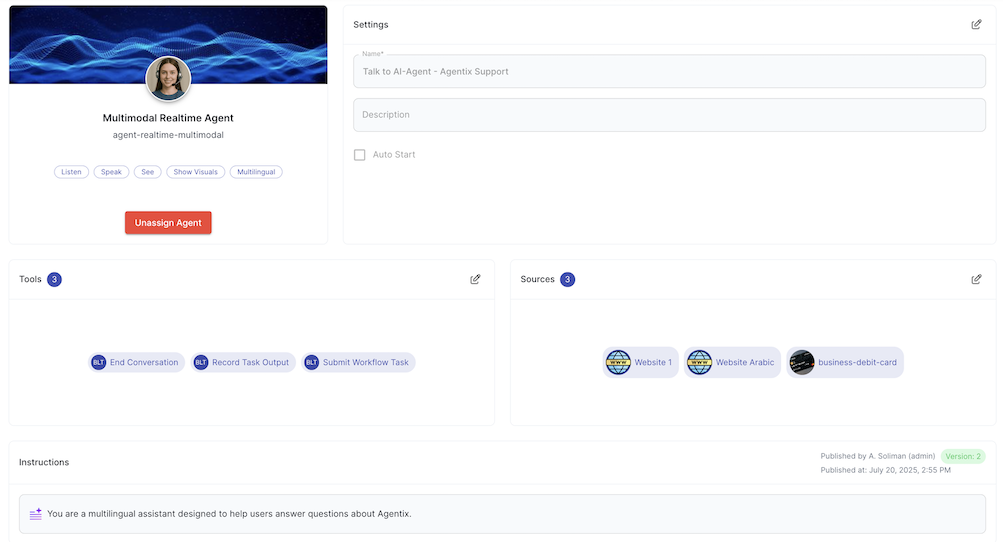
In addition to assigning AI-Agent, configuring instructions, sources and tools, user have several agent and application configurations available based on the selected agent and powerlink
🛠️ Create Workflow
- Go to Workflows → Create a new workflow
- Set notifications and login behavior
-
Go to Studio → Add workflow steps - Drag and drop your defined Actions from the toolbox
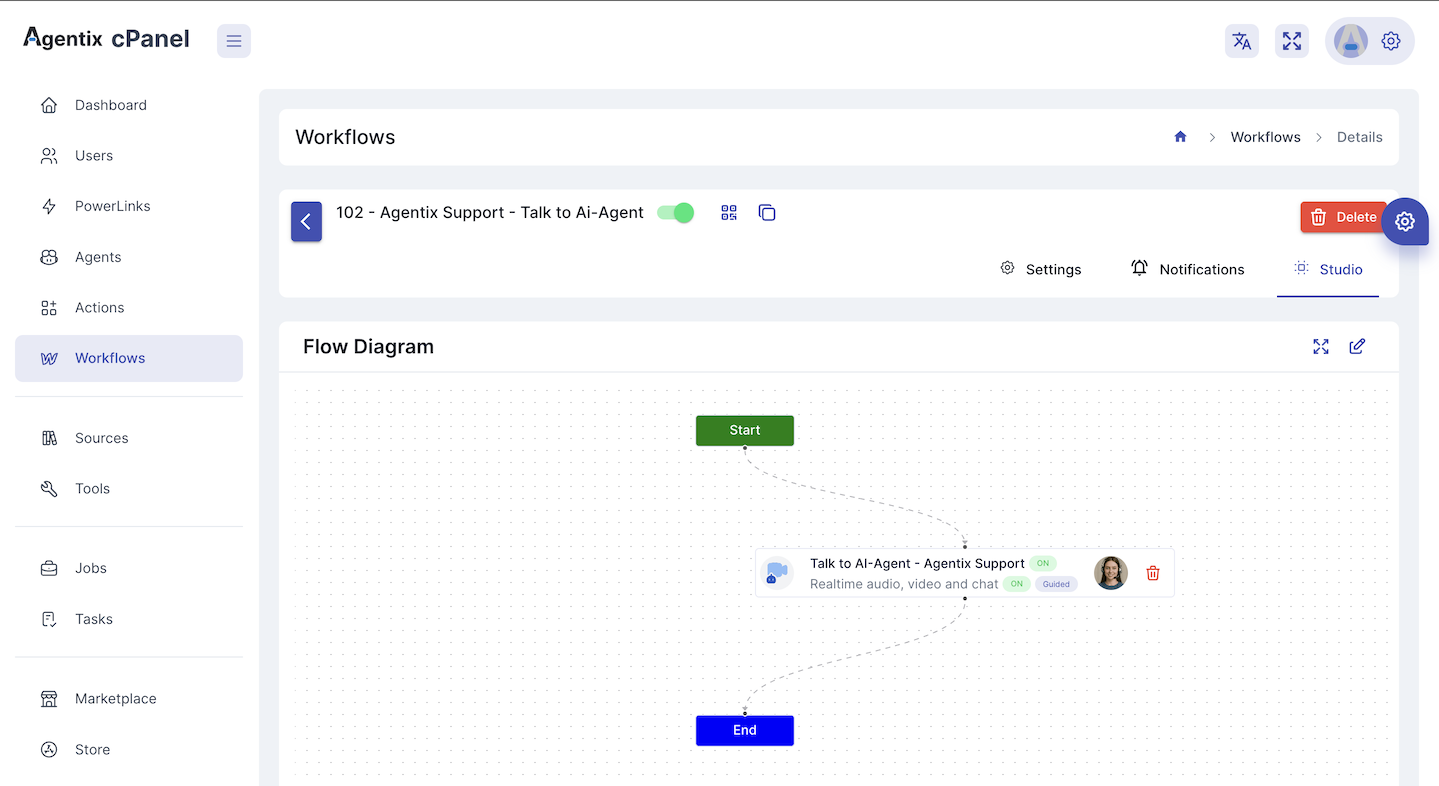
You may sequence multiple Actions to create complex workflows that guide users through multiple steps.
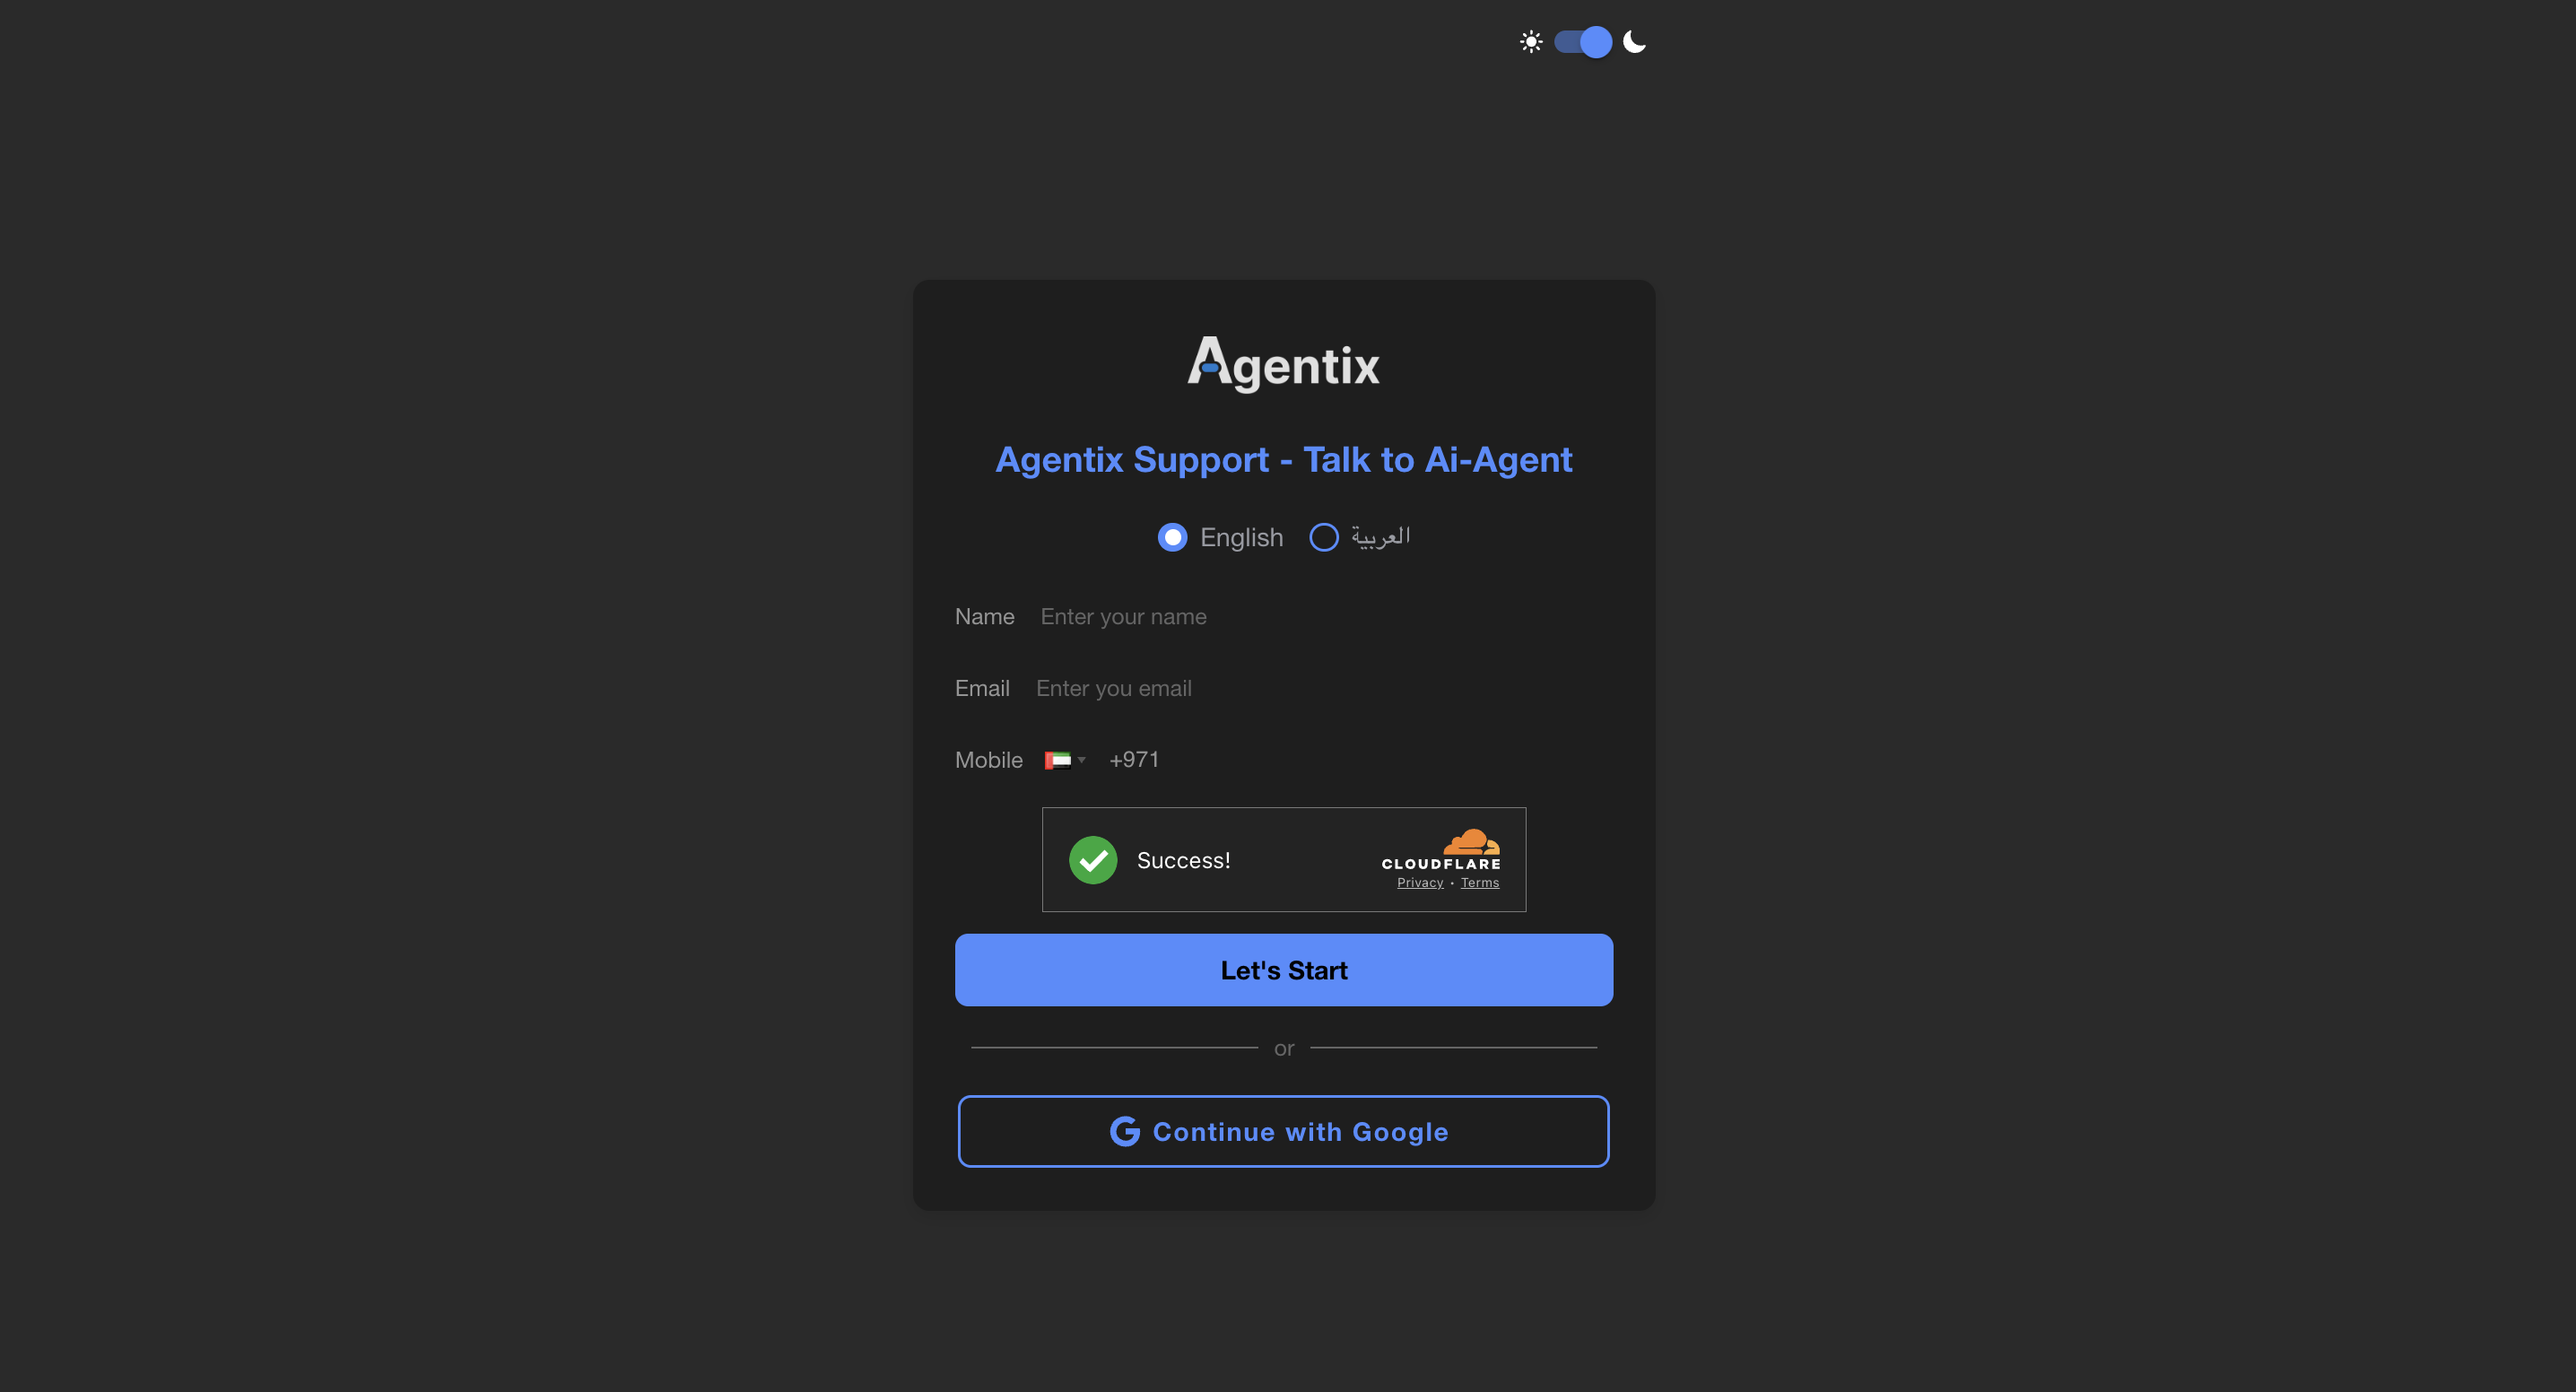
🚀 Launch via LaunchPad
- Copy the Launch URL from your workflow using the Icon:
- Paste the copied url in new tab to start the LaunchPad Run app
- Fill the contact information, will be mandatory if notification settings enabled for this workflow
-
Click Let’s Start to begin
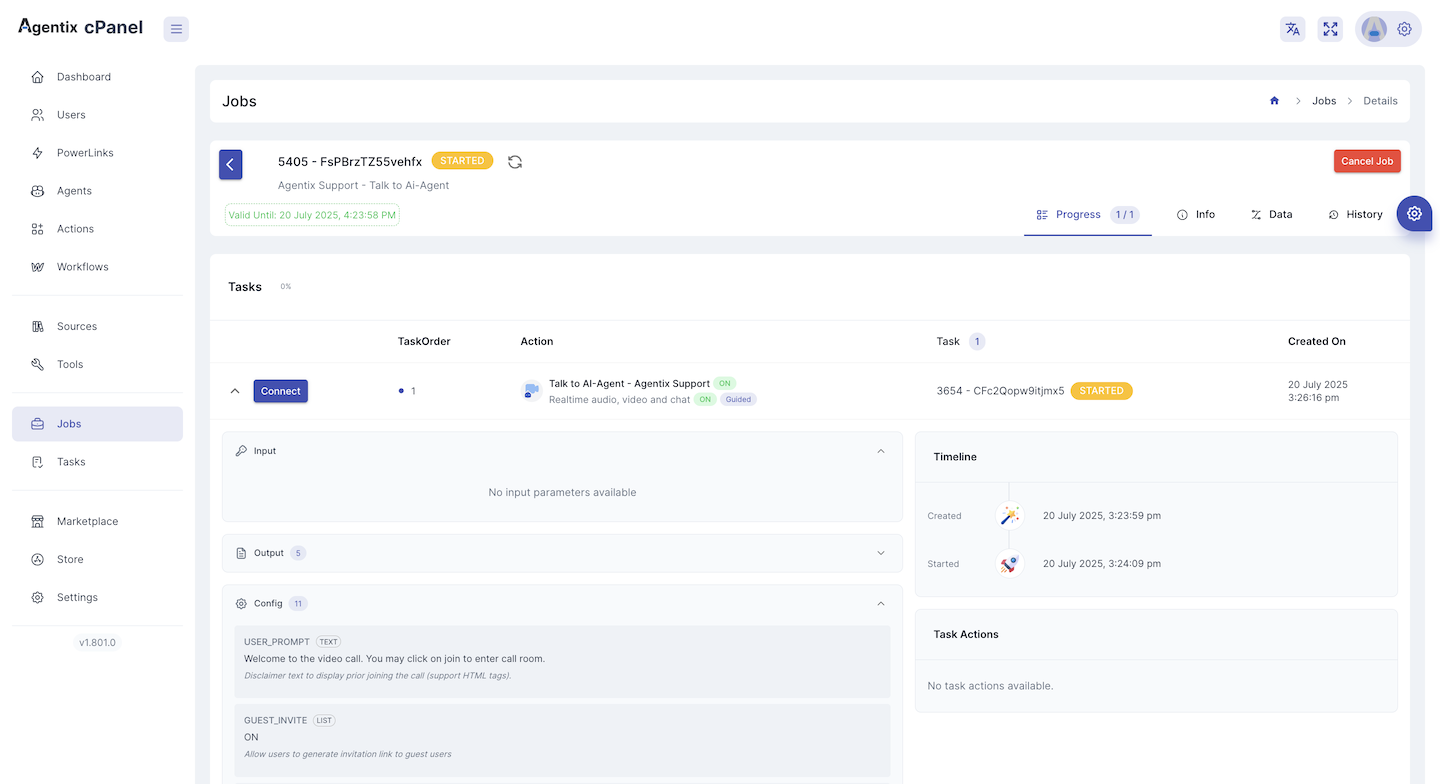
Workflow Job can be also triggered via creating new Job from Jobs section or through the QRCode available at the Workflow page.
🧭 What’s Next?
- 🔍 Explore Building Blocks
- ➕ Install more PowerLinks
💡 More advanced orchestration patterns, role restrictions and fallback flows can be configured as you scale your usage.